How to Bridge from Solana to Ethereum

As a seasoned blockchain enthusiast, I've navigated the world of cryptocurrencies and their underlying technologies, gaining insights that have transformed my understanding and approach. Today, I'm excited to share a pivotal aspect of blockchain interoperability: bridging from Solana to Ethereum.
What are crypto bridges?
Crypto bridges are vital tools in the blockchain world. They connect two different blockchain networks, much like how physical bridges connect separate pieces of land. This connection allows for the smooth transfer of assets and information between networks that would otherwise be isolated.
These bridges enable cryptocurrencies and tokens to move effortlessly across various blockchains, enhancing their functionality and usability. For example, users can take advantage of Ethereum's diverse applications while enjoying Solana's fast transaction speeds.
Can We Bridge from Solana to Ethereum?
Yes, bridging from Solana to Ethereum is possible. Several projects and decentralized applications (dApps) facilitate this cross-chain transfer. These bridges allow users to move assets like SOL, USDC, and other tokens from the Solana network to the Ethereum network seamlessly.
It is also important to choose the right bridge. In the past, users have reported various scams with several exchanges.

Steps to Bridge from Solana to Ethereum
Today we’ll be using Jupiter Exchange to Bridge from Solana to Ethereum

- Step 1: Connect Your Wallets
Start by connecting both your Ethereum and Solana wallets to the Jupiter Exchange.
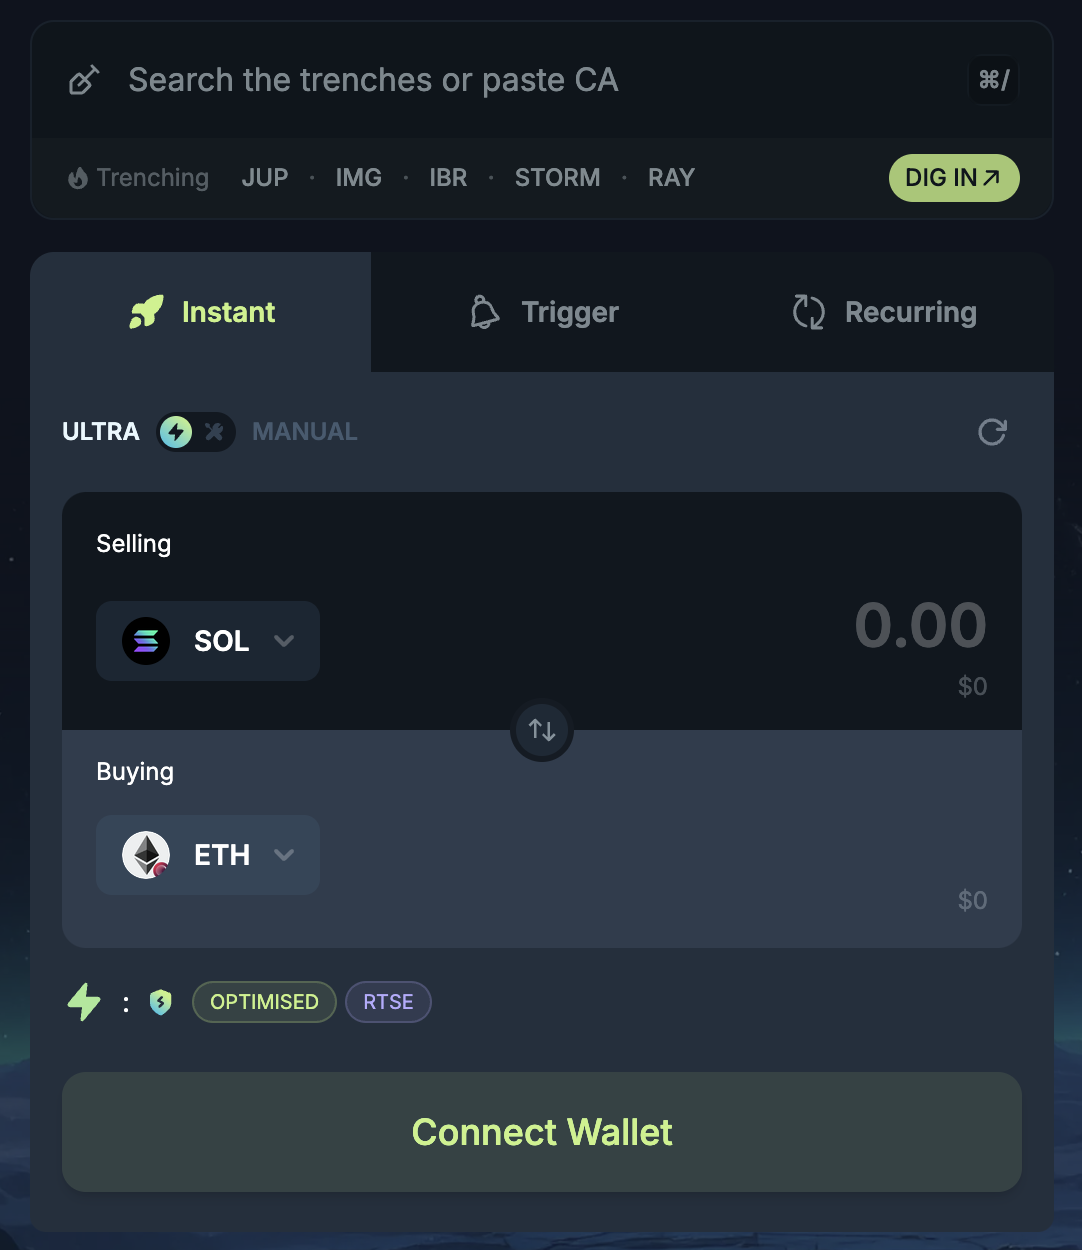
- Step 2: Select the Source Token
Choose Solana as the source blockchain and select ETH as the token you wish to transfer.
- Step 3: Input the Amount
Specify the amount of SOL you want to bridge to Ethereum. Jupiter will display the equivalent amount of ETH you will receive, accounting for the current exchange rates and any applicable fees (RTSE)
- Step 4: Select Destination Token
After entering the amount, select ETH as the destination token on the Ethereum blockchain.
- Step 5: Review and Confirm
Jupiter will provide a detailed summary of the transaction, including the conversion rates, estimated time of arrival, and total fees. It's important to review these details carefully to ensure everything is as expected.
Conclusion
To sum up, bridging from Solana to Ethereum is possible using bridges such as Jupiter, and Thorswap This guide provides you with the necessary knowledge to execute seamless transactions, ensuring you stay ahead in the fast-paced world of cryptocurrencies.
Curious to learn more about bridging and how it empowers seamless asset transfers across chains? Explore our Abstraction Academy on Bridging and unlock the path to efficient interoperability.
A Seamless Alternative: Chain Abstraction
While bridging is a useful tool, it can often be a hassle—managing different wallets, waiting for confirmations, and dealing with fragmented liquidity. But what if bridging wasn’t a necessity, but just an option?
With Chain Abstraction, users can transact seamlessly across chains without the need to bridge, swap, or refuel gas. Arcana Network makes this possible through Arcana Wallet, the first chain abstraction-enabled EOA wallet, which unifies your USDT, USDC and ETH across chains and allows you to spend them effortlessly. Now, apps can also offer this experience by integrating Arcana’s Chain Abstraction SDK, enabling unified balances natively within their platforms.
Install Arcana Wallet: arcana.network/wallet
Demo the SDK: sdk.arcana.network/